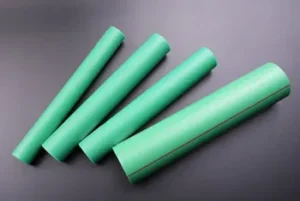
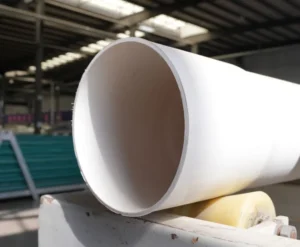
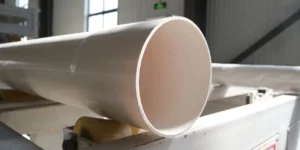
PVC pipe manufacturing is a highly continuous and automated extrusion process. From PVC resin powder to the final finished pipe, the entire production flow involves raw material preparation, compounding, extrusion, sizing and cooling, haul-off, cutting, and multiple precision-controlled stages. Understanding this process is essential for quality control, process optimization, and equipment selection.
This article provides a systematic overview of the PVC pipe production process, explaining the key technical points and quality control methods at each stage.
1. Raw Material Preparation and Formulation
PVC pipe production begins with the precise proportioning of raw materials. The core material is PVC resin (typically SG-3 to SG-5 grade), combined with various additives to form the pipe formulation.
Main Raw Material Components
| Component | Function | Typical Dosage |
|---|---|---|
| PVC resin | Base material | 100 parts |
| Heat stabilizer | Prevents PVC degradation during processing | 3–5 parts |
| Lubricant | Improves flow and mold release | 1.5–4.0 parts |
| Impact modifier | Improves toughness and impact resistance | 2–20 parts |
| Filler (calcium carbonate) | Reduces cost, improves rigidity | 5–15 parts |
| Colorant | Imparts color to the pipe | 0.01–0.10 parts |
| Processing aid | Promotes gelation, improves surface | 1–3 parts |
The formulation must be tailored to the pipe’s final application (water supply, drainage, electrical conduit, etc.), pressure rating, and service environment. For example, water supply pipes require higher impact resistance and hygiene performance, necessitating a higher-quality stabilizer system.
2. Mixing Process: Hot Mixing and Cold Mixing
Raw material mixing is divided into hot mixing and cold mixing stages, which are critical for ensuring material uniformity and processing performance.
Hot Mixing (High-Speed Mixing)
Weighed PVC resin and additives are fed into a high-speed mixer. Under the combined action of friction heat from high-speed stirring and external heating, the material temperature rises to 105–125°C (typically controlled at around 120°C), allowing all components to fully disperse and pre-plasticize. Hot mixing time is generally 5–10 minutes.
Cold Mixing (Low-Speed Cooling)
After hot mixing, the material is immediately transferred to a low-speed cooling mixer and cooled to 40–60°C (typically around 45°C) under stirring before discharge. The purpose of cold mixing is to prevent hot material from agglomerating and to ensure stable temperature and flowability before the material enters the extruder.
Quality control point: The discharge temperature must be strictly controlled during mixing. Too high a temperature causes excessive pre-plasticization, affecting subsequent extrusion; too low a temperature results in uneven mixing and unstable pipe performance.
3. Extrusion: The Core Process
Extrusion is the core stage of PVC pipe production. The mixed powder is fed into the extruder through a forced feeding system, where it is melted and plasticized under high temperature and mechanical shear, then formed into a tubular shape through a die.
Extruder Type
PVC pipe extrusion typically uses a counter-rotating twin-screw extruder. Twin-screw extruders offer excellent mixing capability and stable conveying characteristics, making them suitable for processing PVC, a heat-sensitive material. For large-diameter pipes, parallel twin-screw designs are more common due to their greater flexibility in screw design.
Temperature Control
Temperature control in the extruder is the core factor determining pipe quality. A typical temperature profile is as follows:
| Zone | Temperature Range |
|---|---|
| Feed zone | 180–200°C |
| Compression zone | 170–180°C |
| Melt zone | 165–175°C |
| Metering zone | 160–180°C |
| Die/head | 190–210°C |
Note that the optimal temperature profile varies with different formulations and pipe diameters. Too high a temperature causes PVC decomposition, resulting in bubbles and discoloration; too low a temperature leads to poor plasticization, rough surface, and insufficient strength.
Melt Pressure and Gelation Quality
Stable melt pressure must be maintained during extrusion to ensure uniform pipe wall thickness. Gelation degree (degree of plasticization) is a key indicator for evaluating PVC pipe performance and can be assessed by DSC (Differential Scanning Calorimetry) or DCMT (Dichloromethane Test).
4. Sizing and Cooling
After the molten tube exits the die, it immediately enters the sizing and cooling unit. This stage determines the final dimensional accuracy and surface quality of the pipe.
Vacuum Sizing
Vacuum sizing is the most common sizing method for PVC pipes. After the tube enters the vacuum sizing sleeve, it is pressed against the inner wall of the sizing sleeve under vacuum negative pressure, thereby achieving precise outer diameter dimensions and a smooth surface. Vacuum sizing has two core functions: determining outer diameter dimensions and completing initial cooling and shaping.
Cooling Tank
After leaving the vacuum sizing sleeve, the pipe enters a cooling tank for further cooling. Cooling can be achieved by spray cooling, immersion cooling, or a combination of both. The cooling water temperature is typically controlled at 15–20°C, and the pipe must be cooled evenly inside and out to avoid internal stress or deformation caused by uneven cooling.
For large-diameter pipes, some advanced production lines are equipped with internal conductive cooling mechanisms to simultaneously cool from the inside, further improving cooling efficiency and wall thickness uniformity.
5. Haul-Off and Cutting
Haul-Off Unit
After cooling and sizing, the pipe is pulled forward at a stable speed by the haul-off unit. The haul-off speed must precisely match the extrusion speed; any fluctuation will cause variations in pipe wall thickness. Haul-off units typically use caterpillar or belt-type structures, adjusting clamping force to accommodate different pipe diameters.
Online Inspection
During haul-off, advanced production lines install online inspection systems (such as high-resolution CCD cameras) on the pipe surface to identify surface defects such as dots, bubbles, and scratches in real time. Defective products are promptly rejected, and data is fed back for technicians to adjust process parameters.
Cutting and Trimming
When the pipe reaches the predetermined length, an automatic cutting machine is triggered by photoelectric sensing or an encoder to cut it. Cutting methods typically include chipless cutting or saw blade cutting, followed by deburring with a trimming machine. Modern production lines often use combined haul-off and cutting machines, synchronized to ensure the cutting speed matches the haul-off line speed, achieving precise, burr-free cutting.
6. Marking and Packaging
Finished pipes are marked with specifications, brand, production batch, and other identification information via inkjet printers, then automatically wrapped and packaged by automatic packaging machines and transported to the finished product storage area.
7. Quality Control System
PVC pipe quality control runs through the entire production process and mainly includes the following stages:
Raw Material Inspection
Inspect PVC resin for particle morphology, apparent density, volatile content, and whiteness to ensure the purity and stability of the base material.
In-Process Control
- Temperature monitoring: Each heating zone temperature must remain within the set range
- Melt pressure monitoring: Ensures extrusion stability
- Online surface inspection: Real-time defect identification
- Wall thickness measurement: Online monitoring via ultrasonic or laser thickness gauges
Finished Product Testing
According to relevant standards (such as ASTM D1785, ASTM D2241, GB/T 10002, etc.), finished pipes undergo the following tests:
| Test Item | Test Method | Purpose |
|---|---|---|
| Hydrostatic test | Long-term internal pressure | Verify pressure resistance |
| Falling weight impact | Low-temperature drop hammer impact | Evaluate impact resistance |
| Vicat softening temperature | Thermal deformation test | Verify heat resistance |
| Longitudinal reversion | Dimensional change after heating | Evaluate internal stress |
| Dichloromethane test | Solvent immersion | Evaluate gelation quality |
| Density measurement | Immersion method | Verify formulation consistency |
8. Key Technical Points and Common Issues
Common Quality Problems and Countermeasures
| Problem | Possible Cause | Solution |
|---|---|---|
| Surface dots/bubbles | High moisture content in raw material, gas in cooling water | Strengthen raw material drying, optimize vacuum sizing |
| Uneven wall thickness | Unbalanced die flow channels, haul-off fluctuation | Adjust die, stabilize haul-off speed |
| Poor gelation | Low temperature, insufficient screw shear | Increase barrel temperature, optimize screw design |
| Pipe discoloration | PVC decomposition due to excessive temperature | Lower processing temperature, check stabilizer dosage |
| Rough inner wall | Improper core die temperature, insufficient lubrication | Adjust core die temperature, optimize lubrication system |
Process Optimization Trends
Modern PVC pipe production is moving toward intelligent and energy-efficient development. Technologies such as automatic temperature control (ATC), online wall thickness feedback adjustment, and energy-optimized screw designs are gradually becoming widespread to improve product quality consistency and production efficiency.
Conclusion
PVC pipe production is a continuous process involving multiple stages of precision control. From raw material formulation design to mixing, extrusion, sizing and cooling, haul-off and cutting, every step directly affects the performance and quality of the final product. Understanding this process helps engineers and procurement professionals better evaluate pipe quality, optimize production processes, and make more informed decisions when selecting pipes. With the deeper application of intelligent manufacturing technologies, PVC pipe production is continuously evolving toward higher efficiency, greater stability, and improved environmental performance.